Welcome to WPMARS Hosting! We’re excited to have you on board. This guide will help you get started with your WordPress hosting account. We’ll cover everything from setting up your domain to managing your WordPress site using our tools.
1. Accessing Your Account
Once you’ve completed the sign-up process, you’ll receive an email with your login details. This will include access to both the WHMCS client area, where you manage your billing and orders, and the DirectAdmin control panel, where you manage your hosting services.
- WHMCS: This is your primary dashboard for managing orders, invoices, and support tickets.
Login: https://my.wpmars.com/index.php?rp=/login
- DirectAdmin: This is where you’ll manage your WordPress site, domains, email accounts, and other hosting features.
Login: https://usada01.myserver-cp.com:2222/evo/login
2. Setting Up Your Domain
Option A: Using WPMARS Nameservers
To make your domain work with WPMARS Hosting, you need to point it to our nameservers. Log in to your domain registrar (where you purchased your domain) and update the nameservers to:
- ns1.myserver-cp.com
- ns2.myserver-cp.com
This will automatically point your domain to your hosting account with us.
Option B: Using External DNS
If you prefer to manage your DNS settings with an external provider, you can point your domain to our server using the following IP address:
- 38.46.222.132
In your external DNS provider’s control panel, create an A record for your domain (e.g., yourdomain.com) and point it to this IP address.
3. Installing WordPress
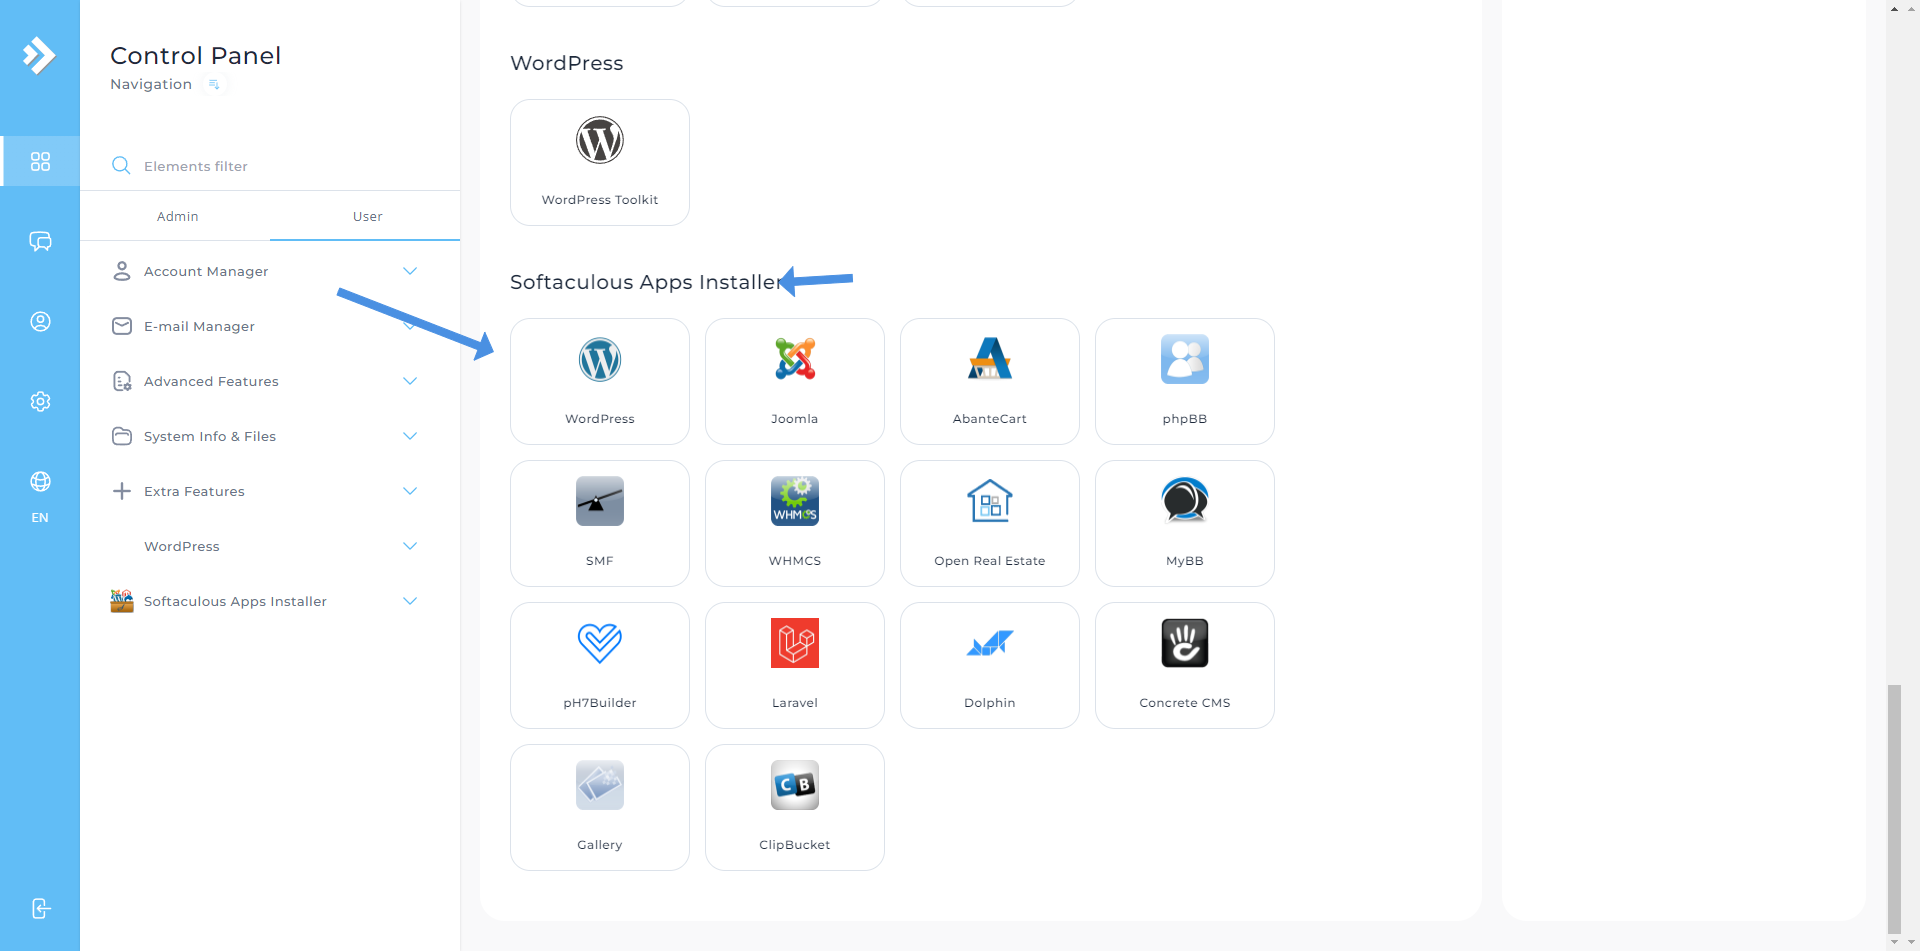
WPMARS makes it easy to install WordPress using Softaculous, a one-click installer available in your DirectAdmin control panel.
- Login to DirectAdmin using the details provided in your welcome email.
- Scroll to the bottom of panel in the ‘Softaculous Apps installer’ section.
- Select WordPress from the list of available scripts.

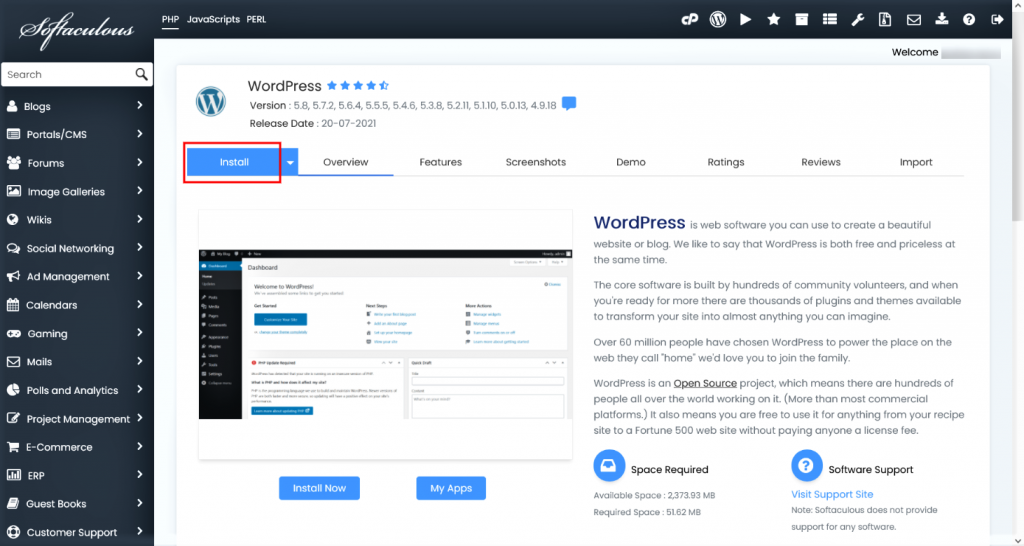
1: Select WordPress from list 
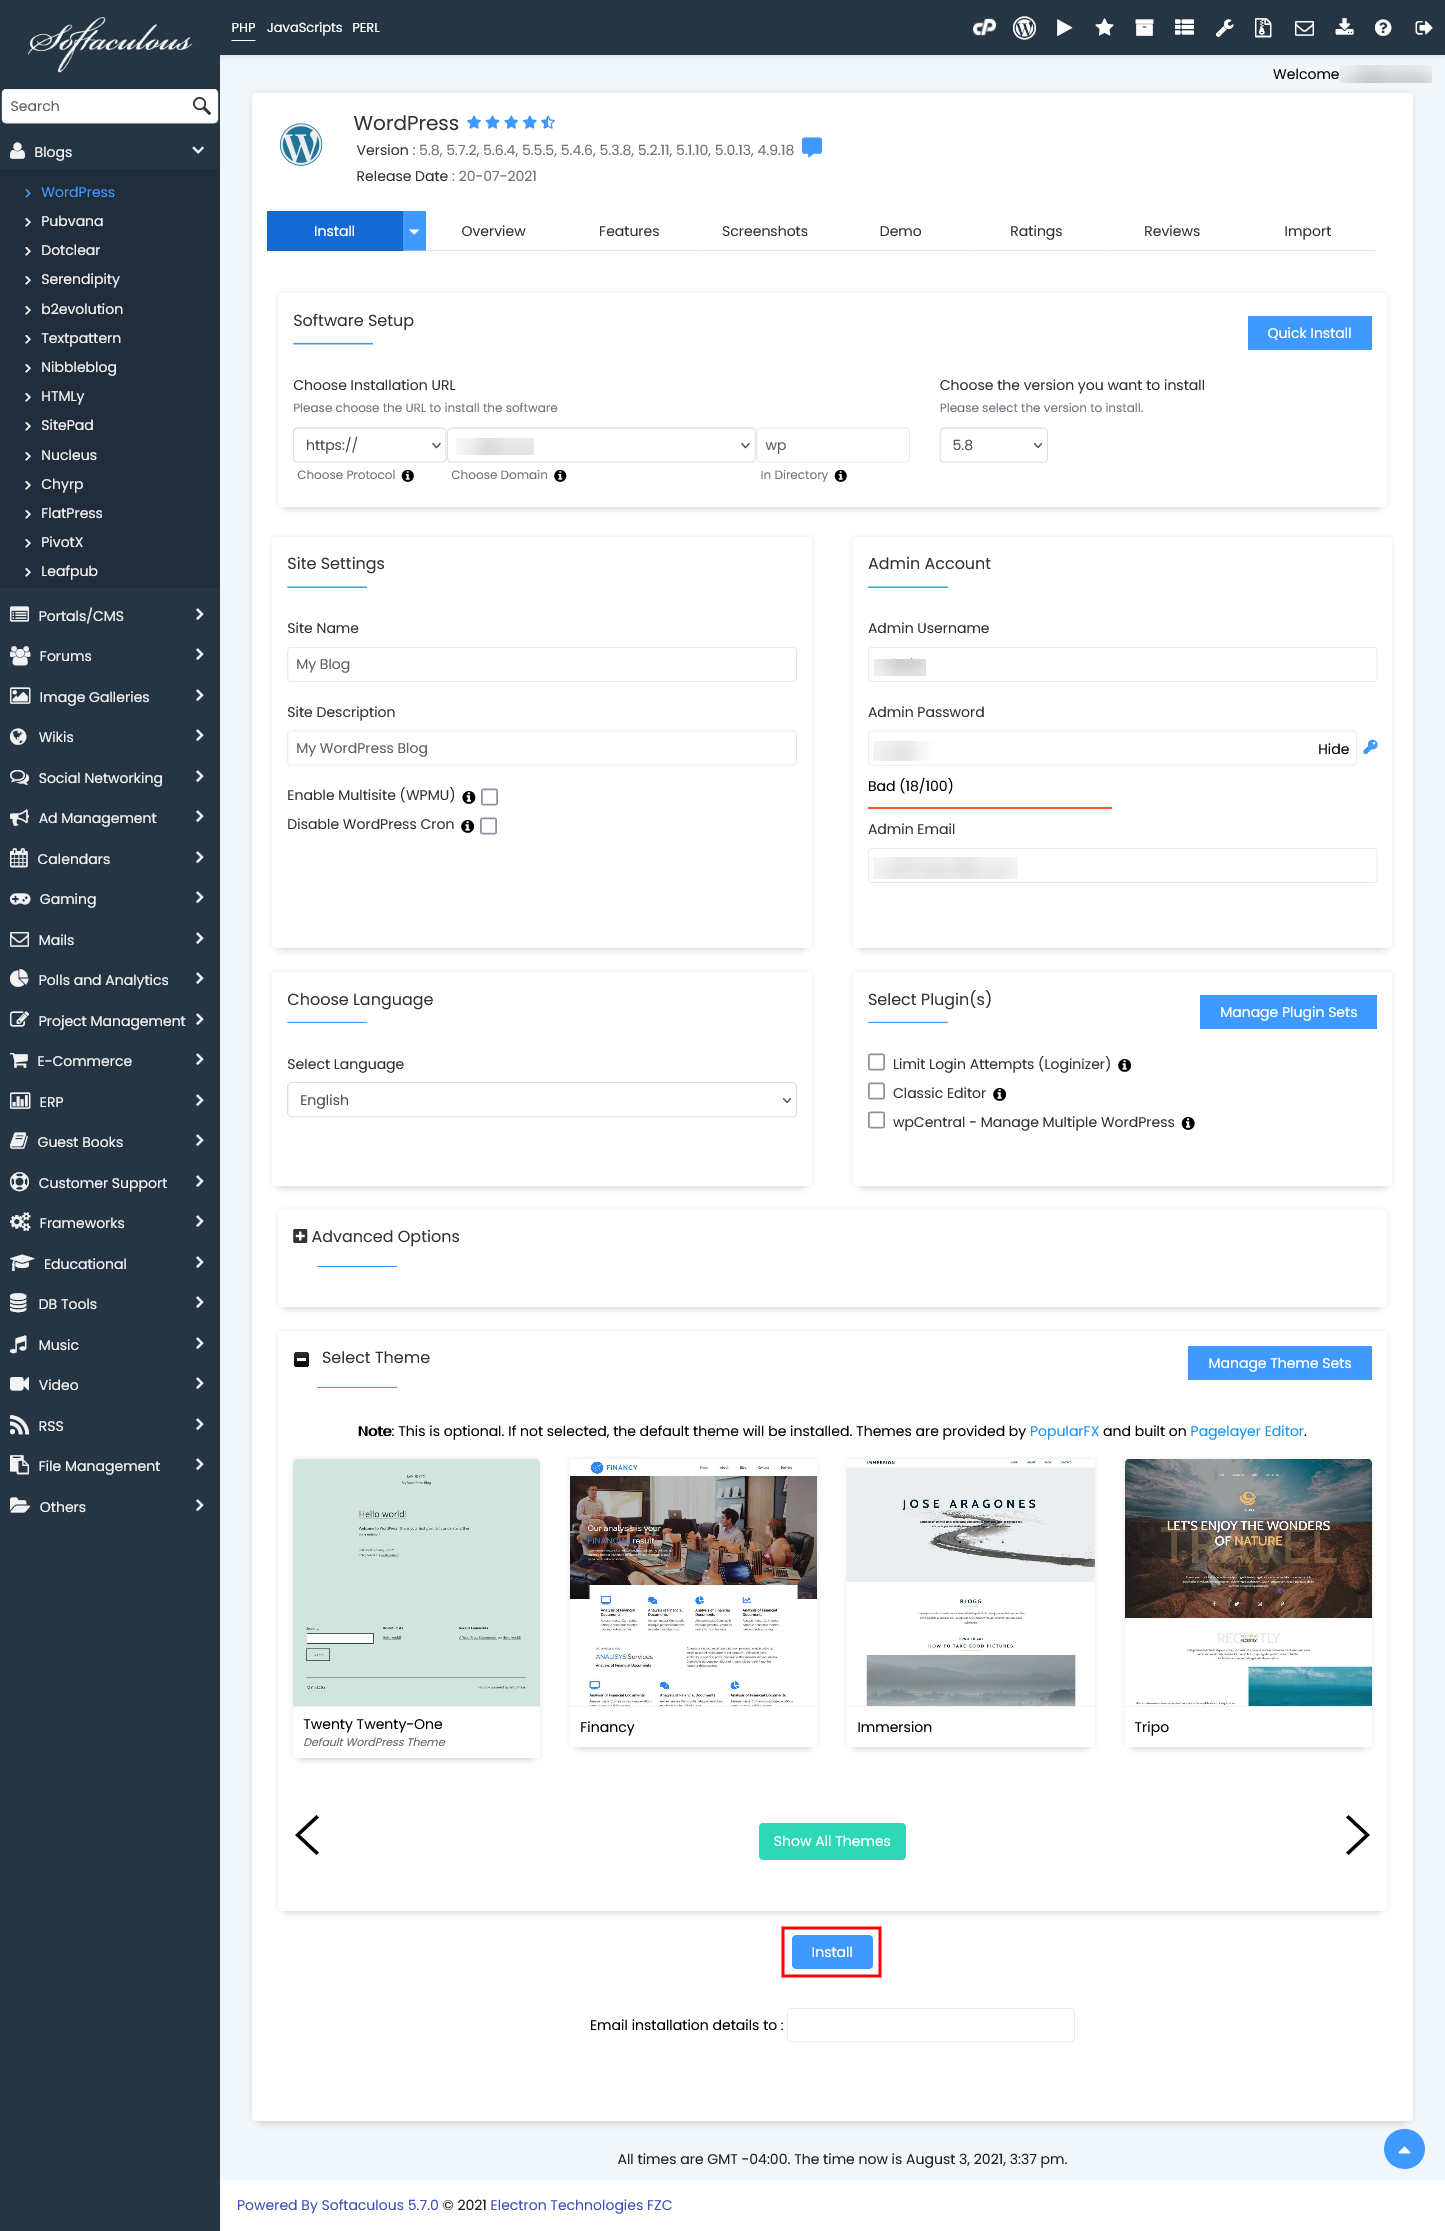
2: Click on Install Button - Fill in the installation details:After clicking on the Install button, you need to fill in the form displayed as shown in the screenshot below. The form asks lots of details (which are prefilled by default), you can change it if you need or leave it as it is and proceed with the installation with default values.
Choose Installation URL : Choose the domain and the folder where you want to install WordPress.
Note : If you want to install WordPress in document root i.e. example.com and NOT in a sub directory i.e. example.com/wp then leave the In Directory field as blank.
Admin Username : Choose the username to be used for WordPress admin account
Admin Password : Choose the password to be used for WordPress admin account
Admin Email : Choose the email to be used for WordPress admin account
Select Language : Select the language in which you want to install WordPress

Fill required details 
Now it’s done! - Click Install to automatically set up WordPress on your chosen domain.
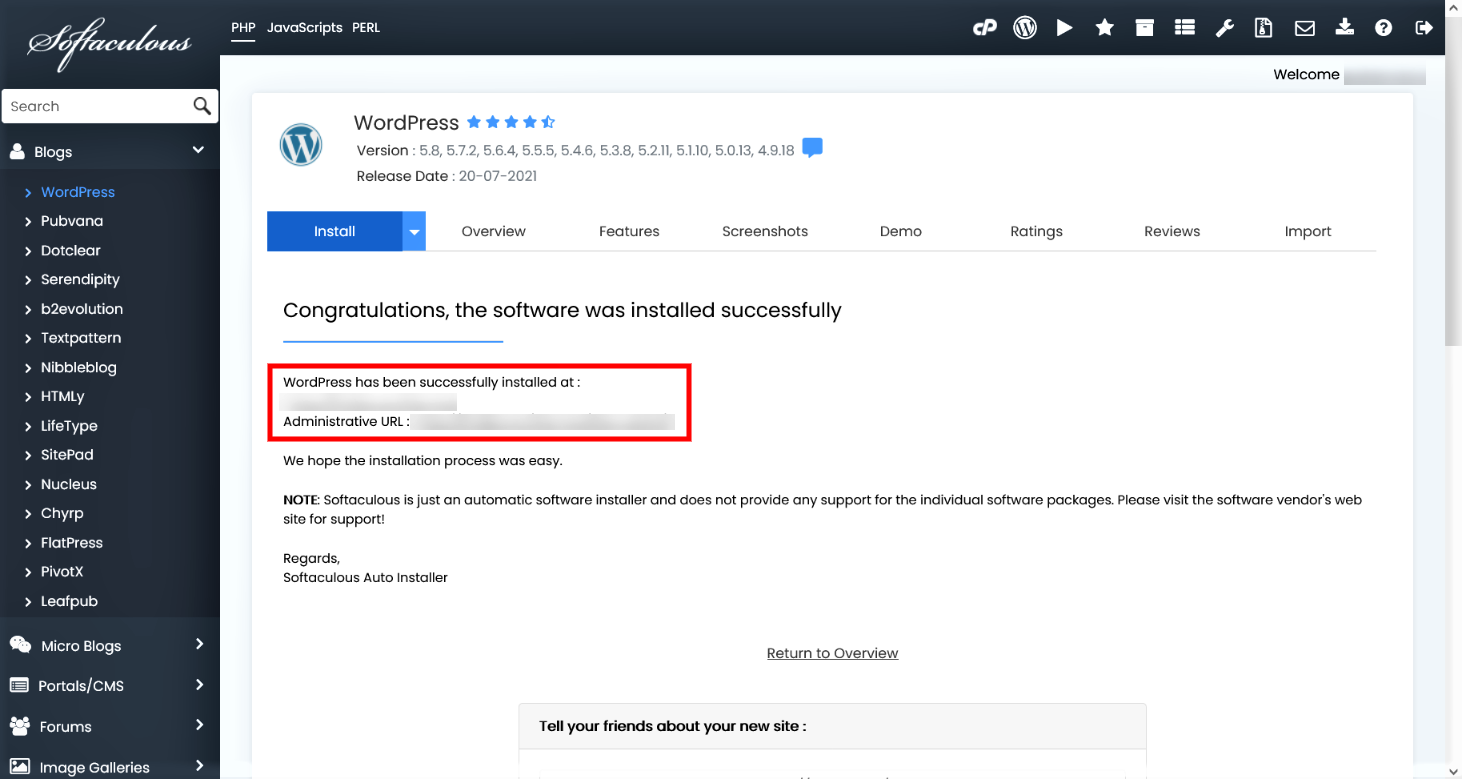
- Access WordPress admin panelYou can then access the WordPress admin panel by using link shows in post installation page (Administrative URL: https://yourdomain.com/wp-admin/)
4. Managing Your WordPress Site
After installing WordPress, you can manage your site using the WordPress Toolkit provided by Softaculous. The toolkit offers features like:
- Automatic Updates: Keep WordPress, themes, and plugins up-to-date.
- Staging: Create a copy of your site for testing changes before making them live.
- Security: Harden your WordPress installation with one-click security features.
Access the WordPress Toolkit through DirectAdmin by navigating to the ‘Extra Features’ section.
5. Need Help? We’re Here for You
If you need assistance at any point, our support team is just a click away. You can open a support ticket through your WHMCS client area or contact us directly via email or chat.
We hope this guide helps you get started with WPMARS Hosting! Enjoy building your website with us, and feel free to reach out if you have any questions.
Happy Hosting!